Route Tables
Route Tables
ℹ️ Information: Route tables control the routing of network traffic within your VPC. This section guides you through configuring route tables to enable communication between peered VPCs.
💡 Pro Tip: Each subnet in your VPC must be associated with a route table, which controls the routing for the subnet. You can associate multiple subnets with the same route table.
Implementation Steps
- Log in to AWS Management Console
- Search for VPC
- Select VPC
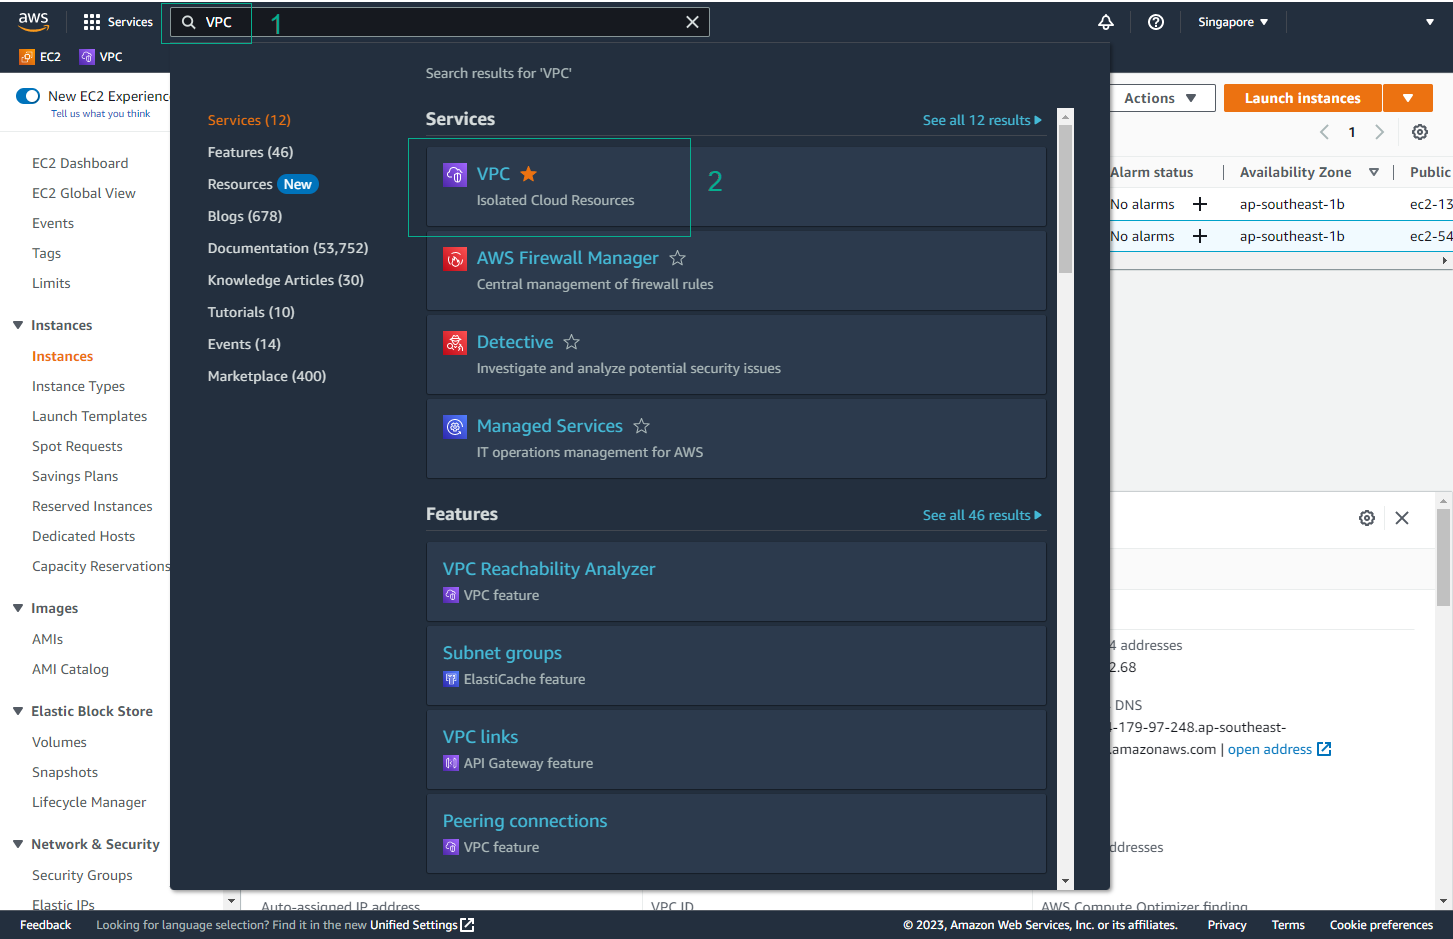
- Edit Route Table
- Select Route Tables from the left sidebar
- Select the public route table associated with My VPC:
10.10.0.0/16 - Click the Routes tab
- Click Edit routes
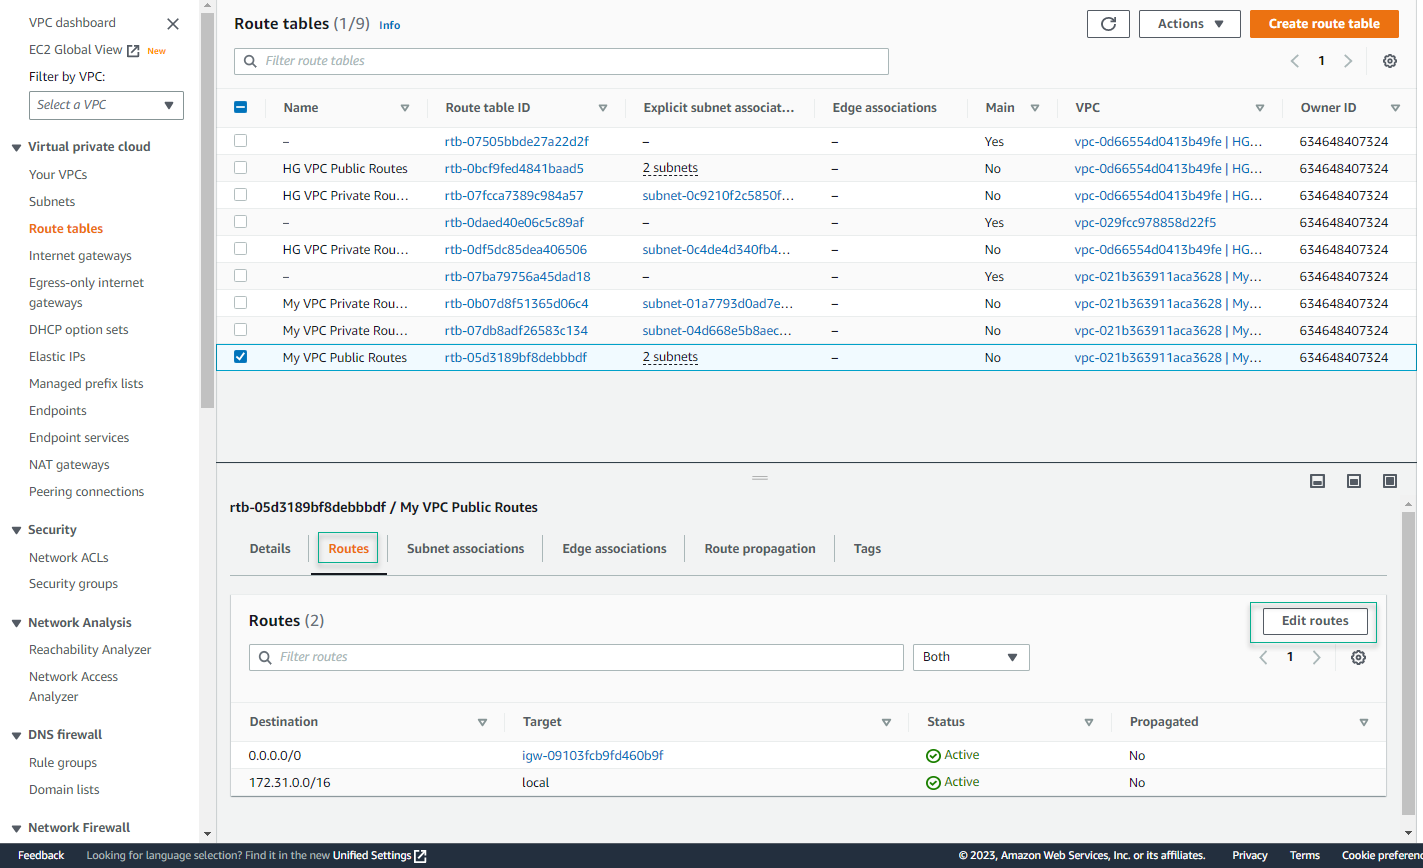
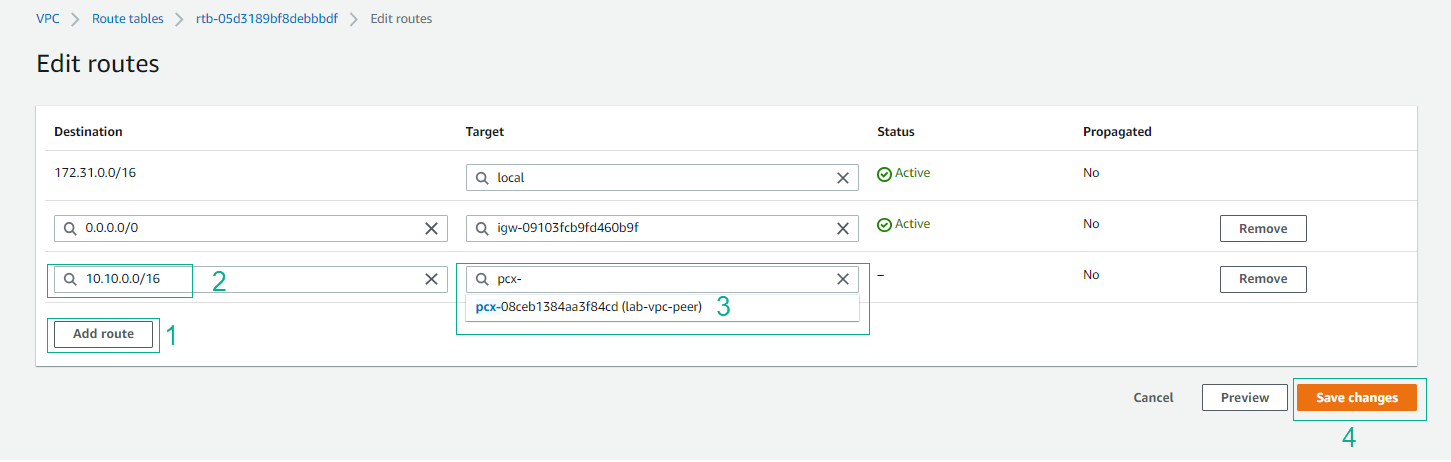
- Add Route for VPC Peering
- Click Add route
- Set the Destination to the CIDR block of HG VPC
- Set the Target to the VPC Peering connection
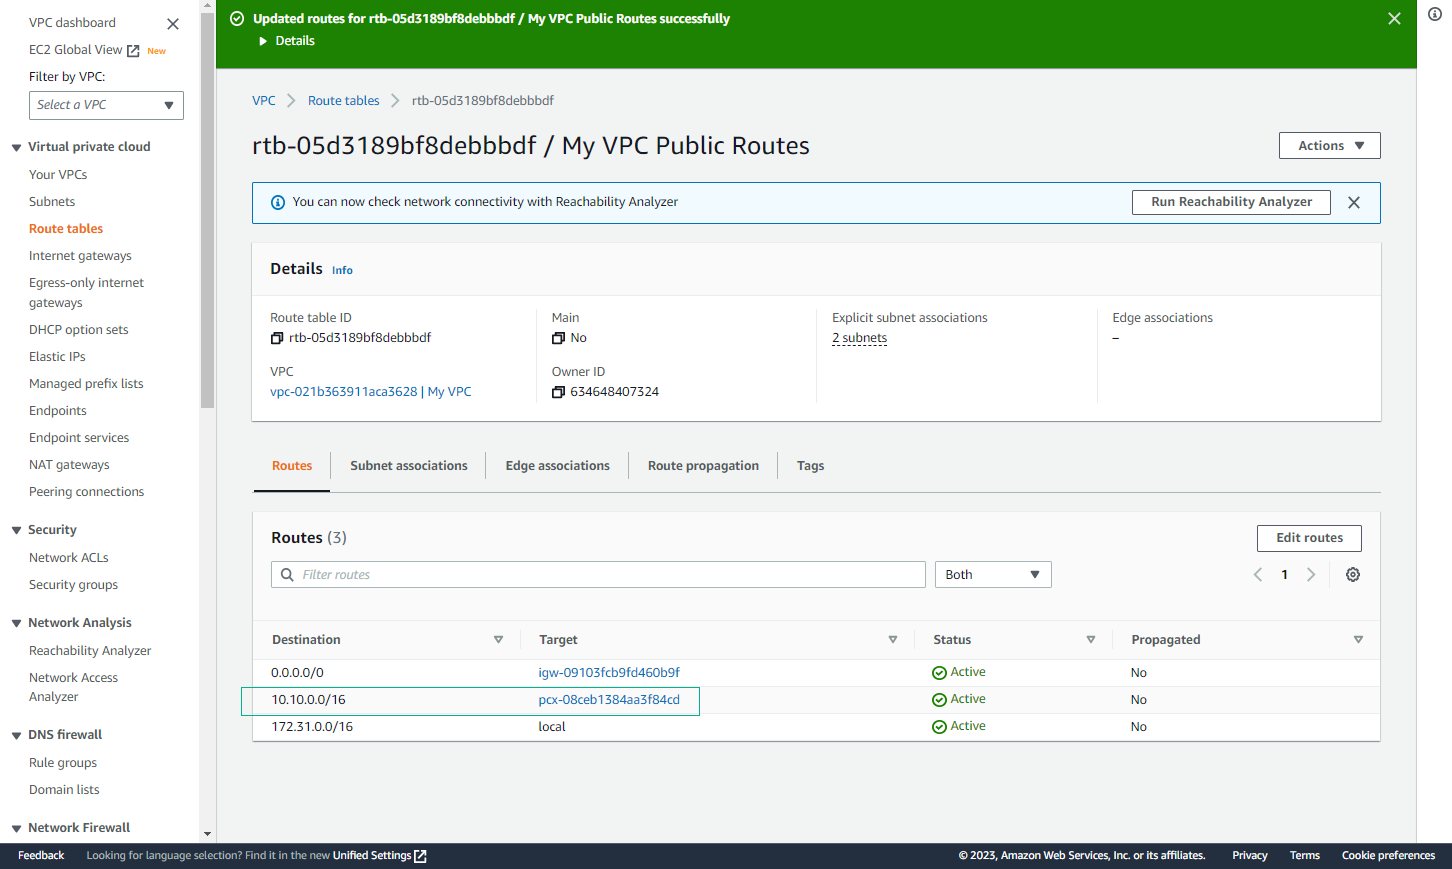
- Click Save changes
- Edit Successfully
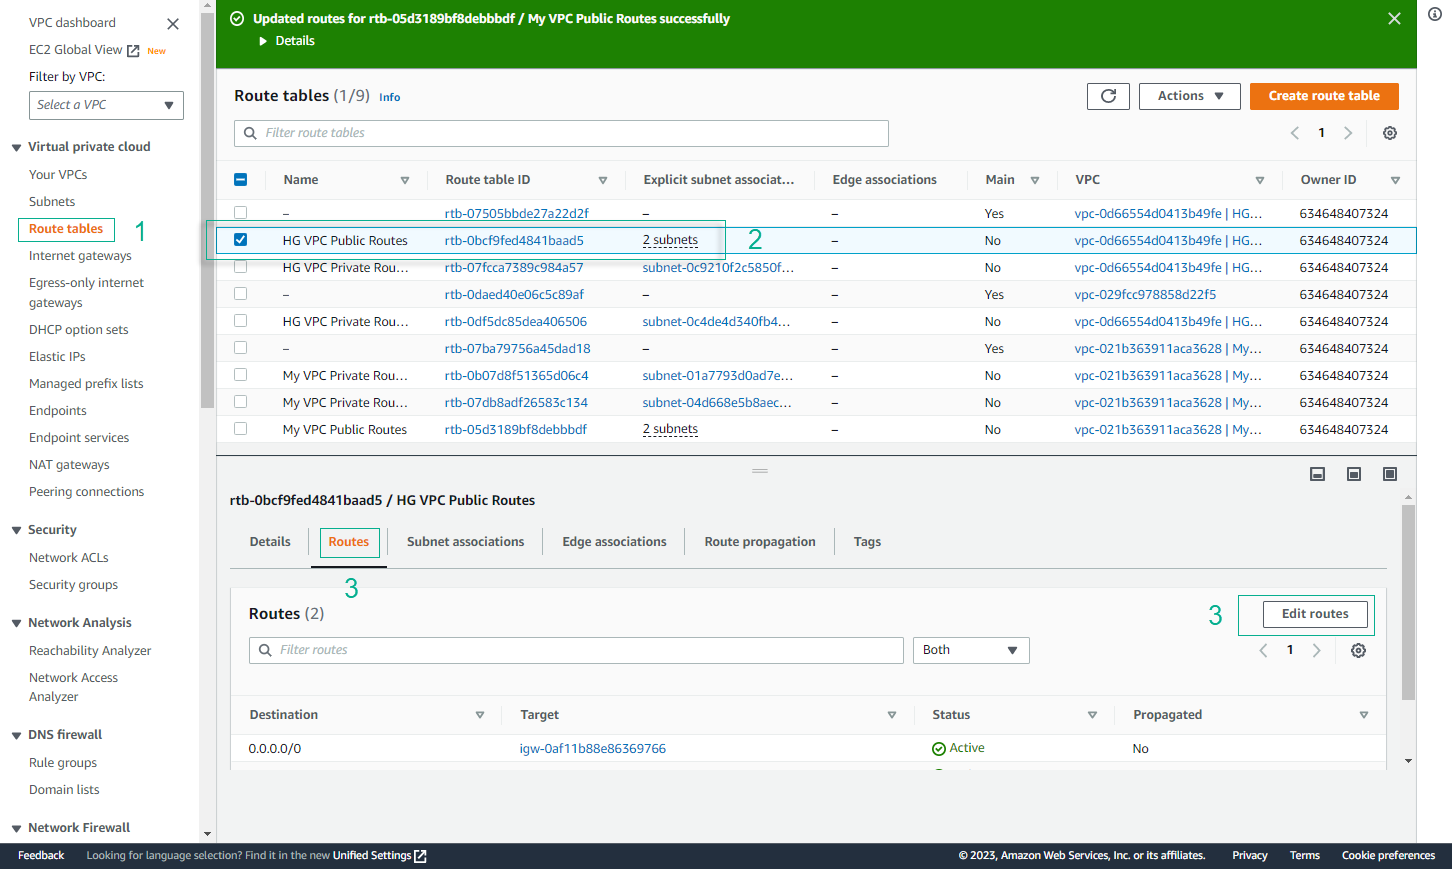
- Repeat for HG VPC
- Select Route Tables from the left sidebar
- Select the public route table associated with HG VPC
- Click the Routes tab
- Click Edit routes
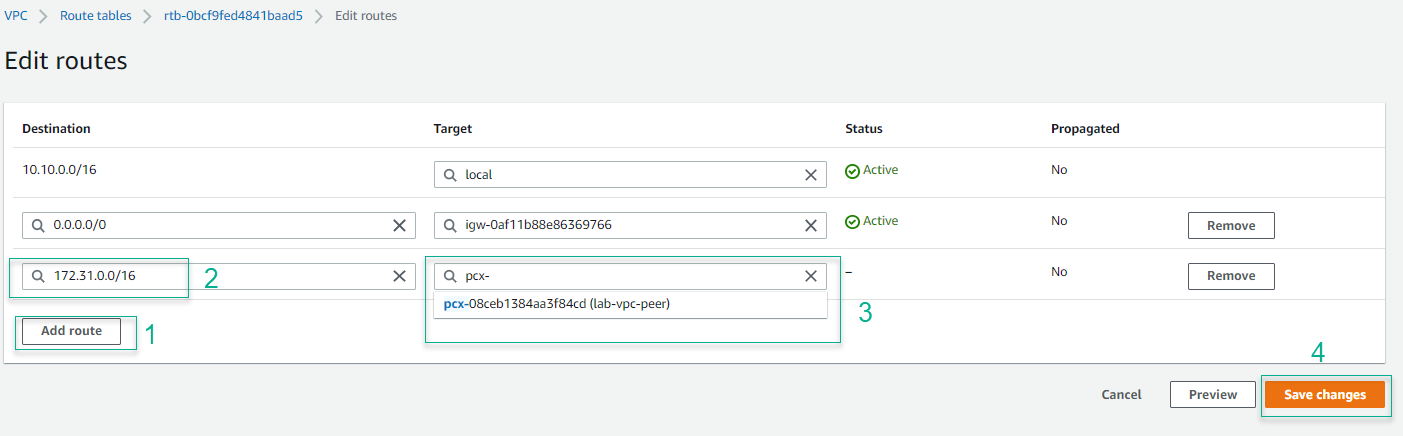
- Add Route for VPC Peering
- Click Add route
- Set the Destination to the CIDR block of My VPC:
172.31.0.0/16 - Set the Target to the VPC Peering connection
- Click Save changes
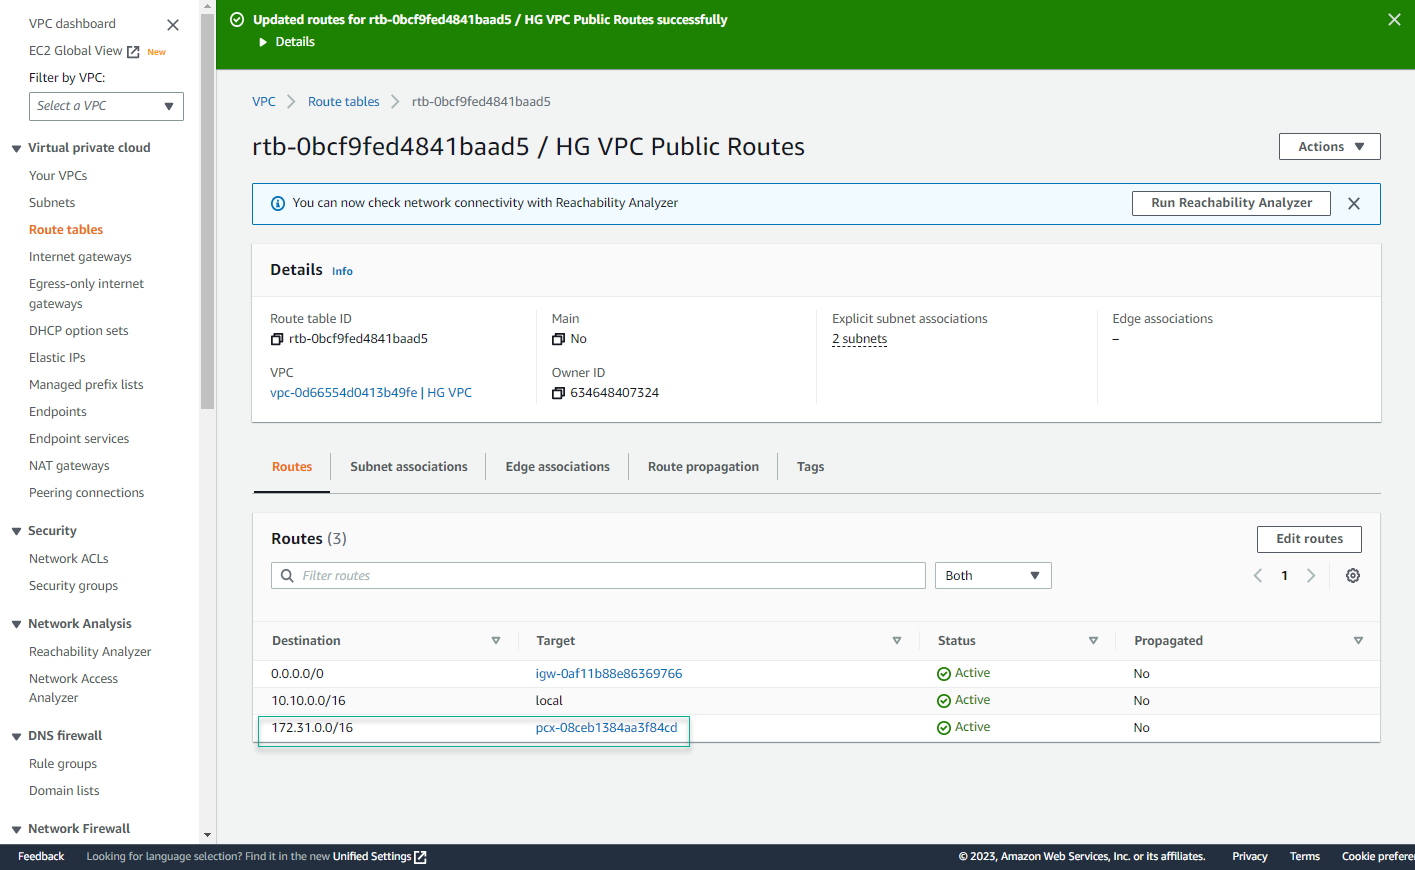
- Verify Configuration
- Ensure both route tables have routes for the peered VPCs
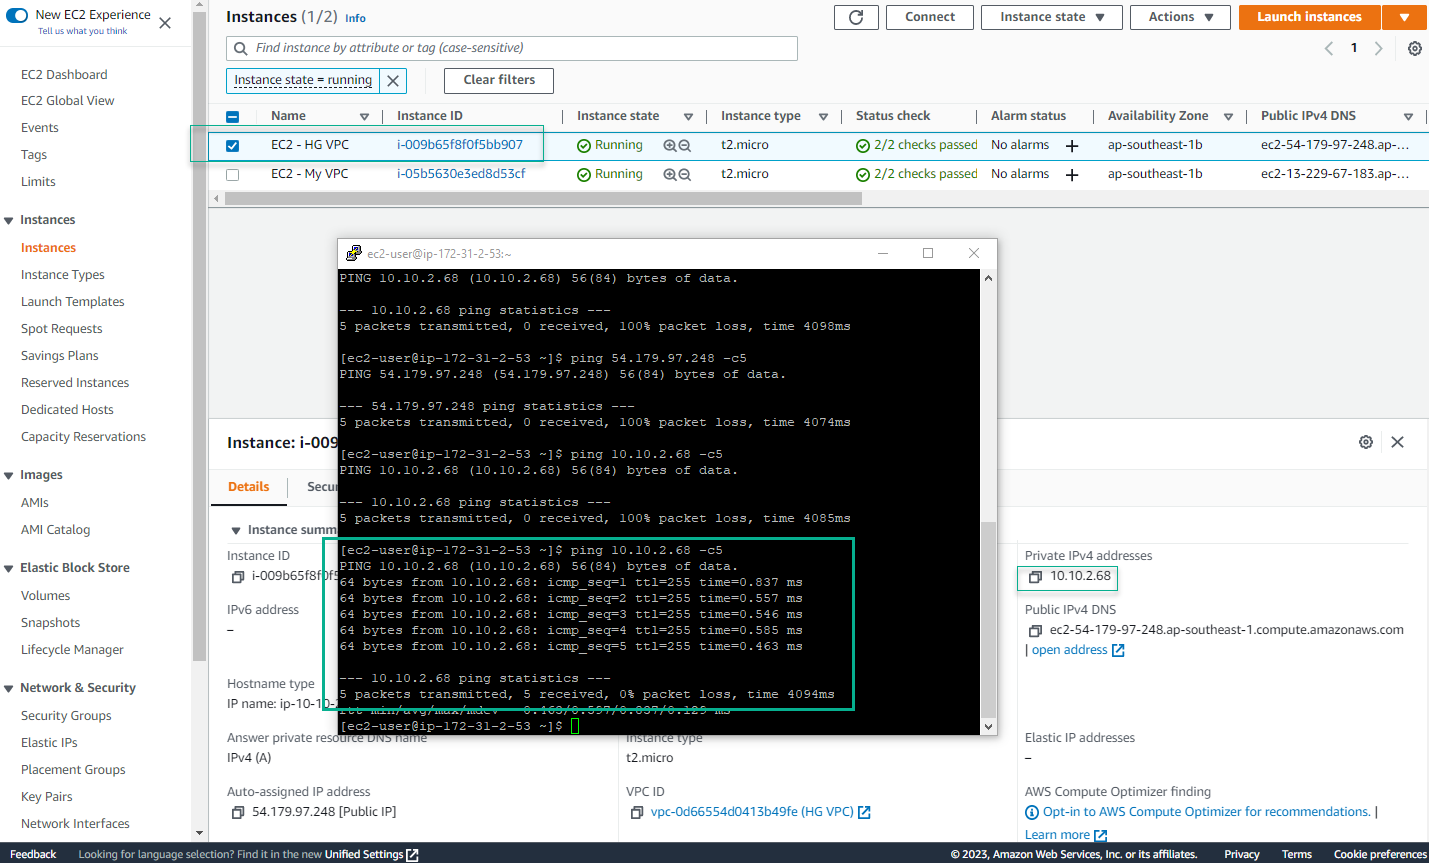
- Test connectivity between EC2 instances in both VPCs
🔒 Security Note: Regularly review and audit your route tables to ensure they only allow necessary traffic between VPCs.
⚠️ Warning: Incorrect route table configurations can lead to network connectivity issues. Always test connectivity after making changes.
💡 Pro Tip: Document your route table configurations and their purposes to maintain clear network policies and facilitate troubleshooting.