Update Network ACL
Update Network ACL
ℹ️ Information: Network ACLs provide an additional layer of security for your VPC, acting as a stateless firewall at the subnet level. In this section, you will configure Network ACLs to control traffic between VPCs.
💡 Pro Tip: Network ACLs are evaluated in order, starting with the lowest numbered rule. The first rule that matches the traffic is applied, regardless of any subsequent rules.
Implementation Steps
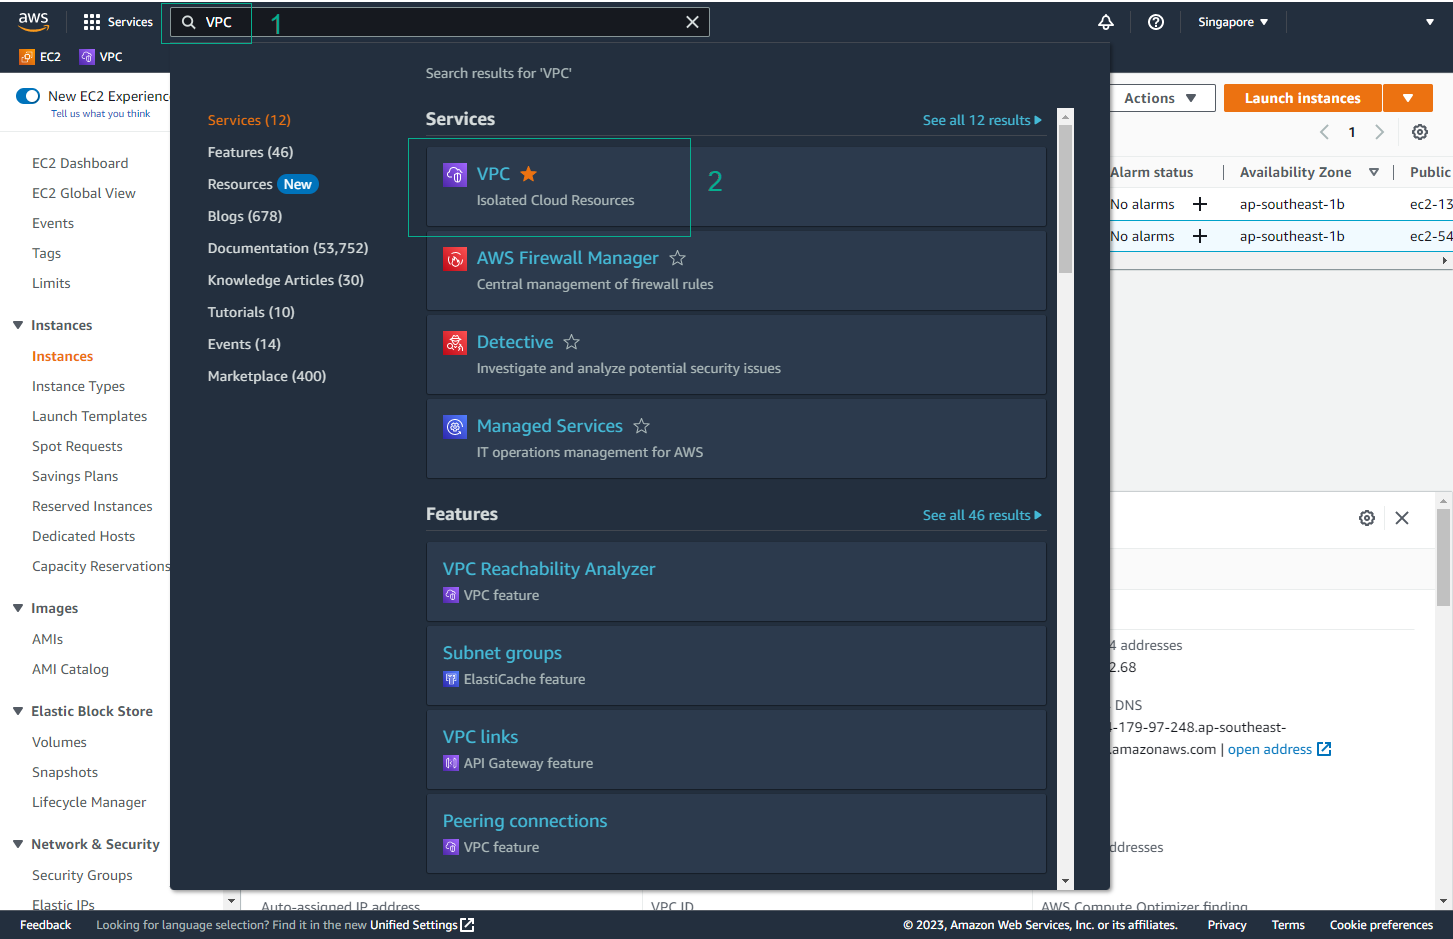
- Access AWS Management Console
- Search for VPC
- Select VPC service
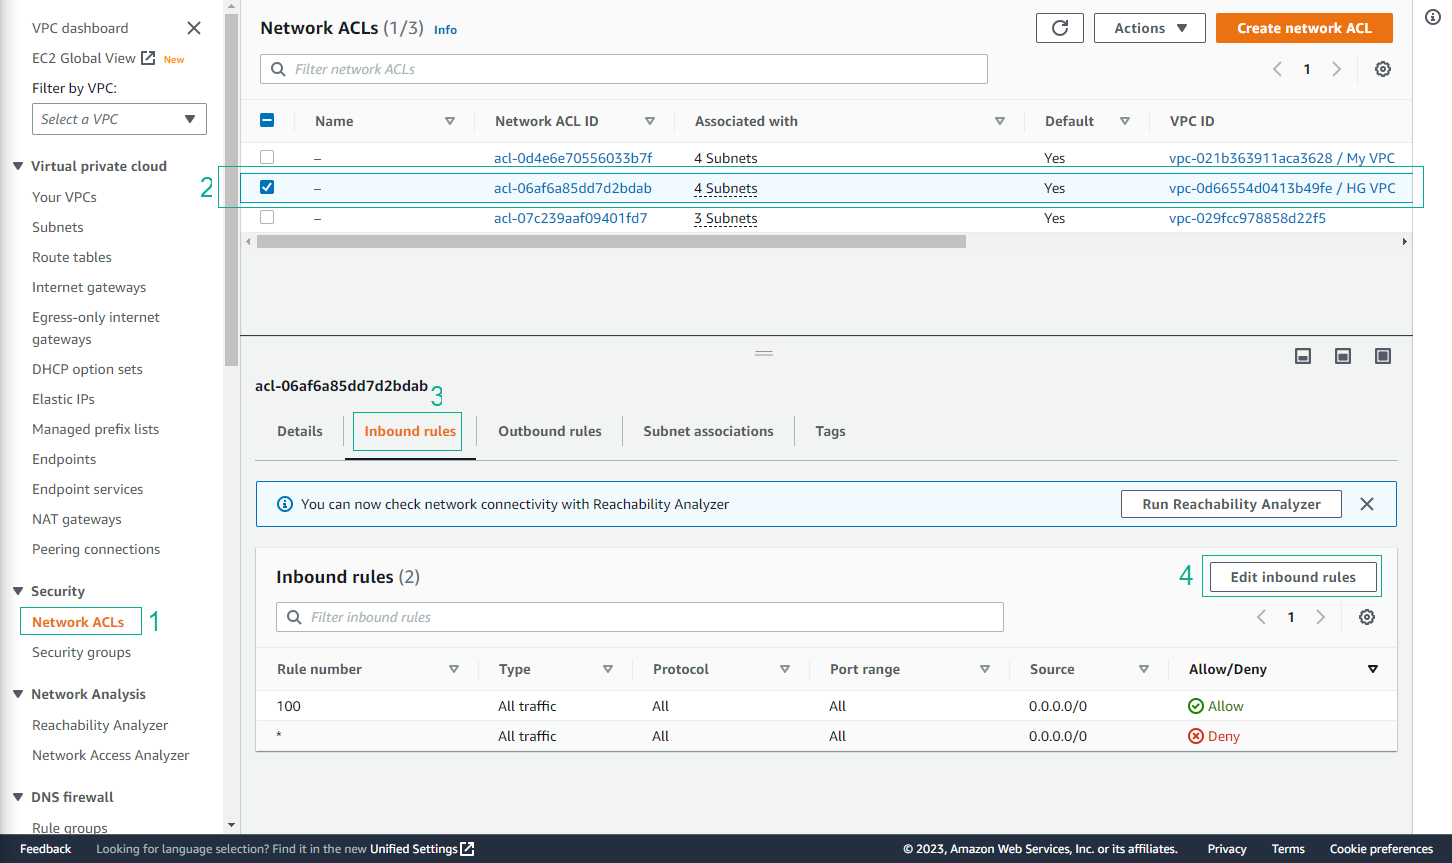
- Navigate to Network ACLs
- Select Network ACLs from the left sidebar
- Select the Network ACL associated with HG VPC subnets
- Click the Inbound Rules tab
- Click Edit inbound rules
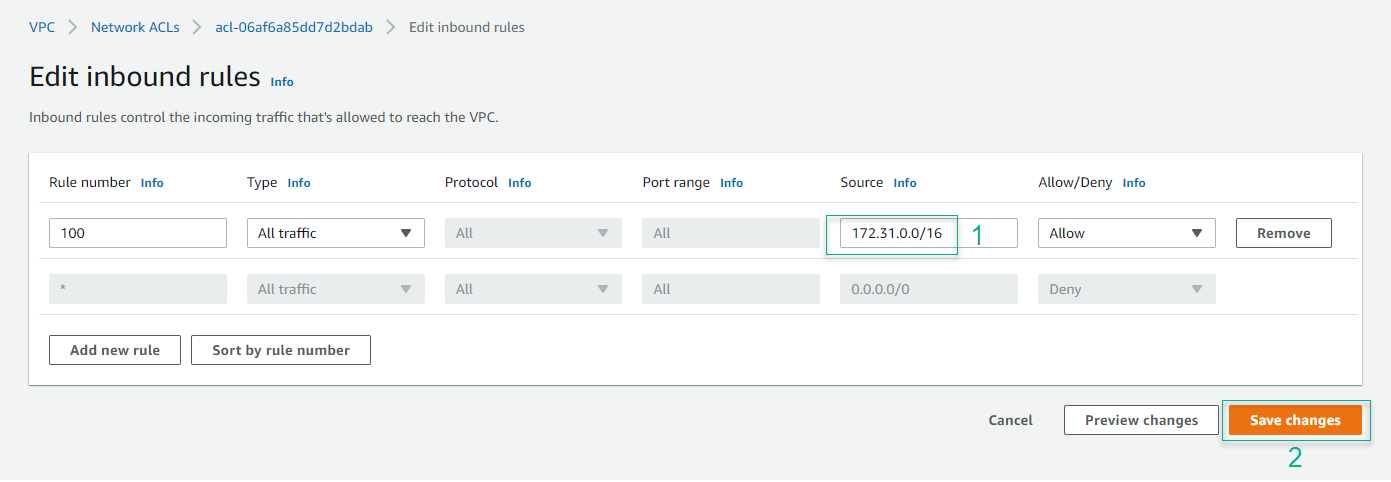
- Modify Rule 100
- Change Source from 0.0.0.0/0 to 172.31.0.0/16
- Click Save changes
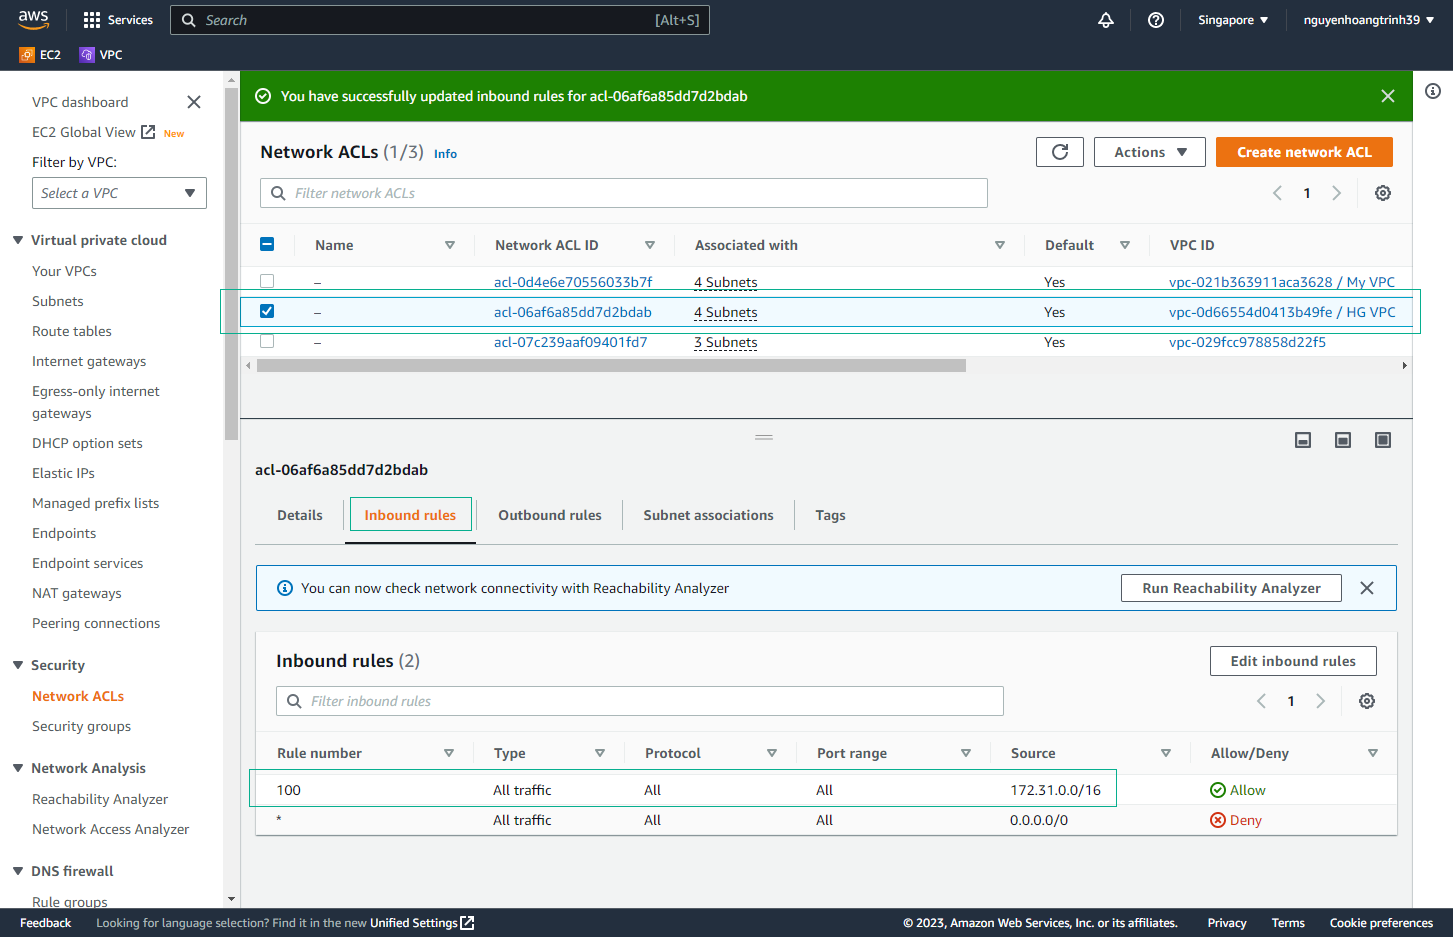
- Verify Configuration
- Network ACL now only allows traffic from My VPC CIDR block
- Only IP addresses in the 172.31.0.0/16 range can connect to HG VPC subnets
- Test Configuration
- From your terminal, attempt to ping the public IP of EC2 - HG VPC
- The ping should fail as the Network ACL now restricts internet access

🔒 Security Note: Network ACLs provide an additional layer of security by controlling traffic at the subnet level. They are stateless, meaning you must configure both inbound and outbound rules.
⚠️ Warning: Be careful when modifying Network ACL rules in production environments. Incorrect configurations can disrupt network connectivity.
💡 Pro Tip: Consider documenting your Network ACL rules and their purposes to maintain clear security policies and facilitate troubleshooting.