Configuring Route tables
Configure Route tables
-
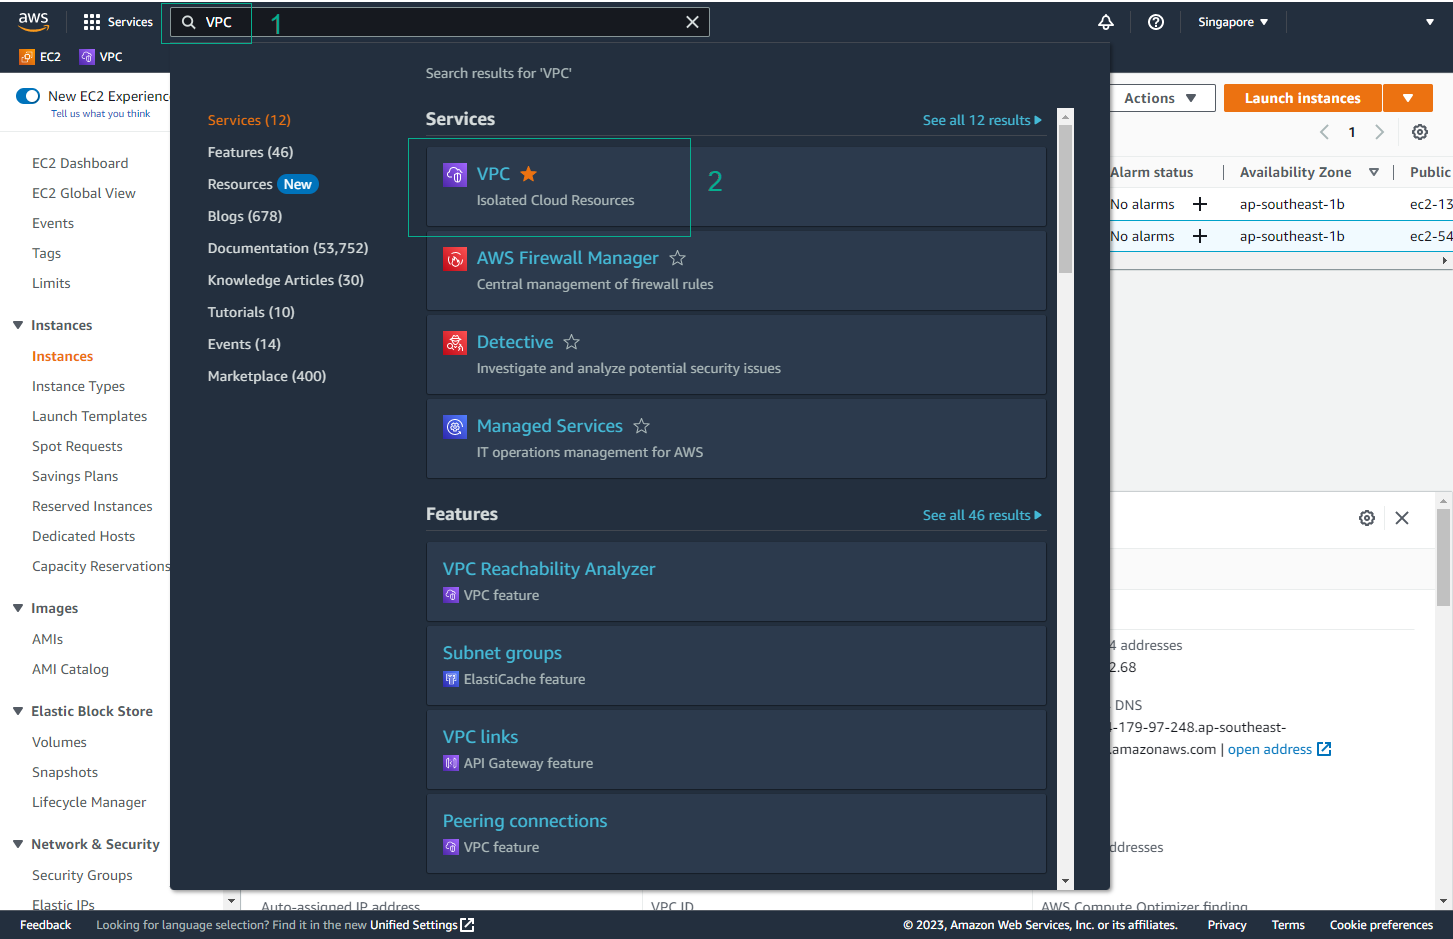
Login AWS Management Console
- Find VPC
- Select VPC
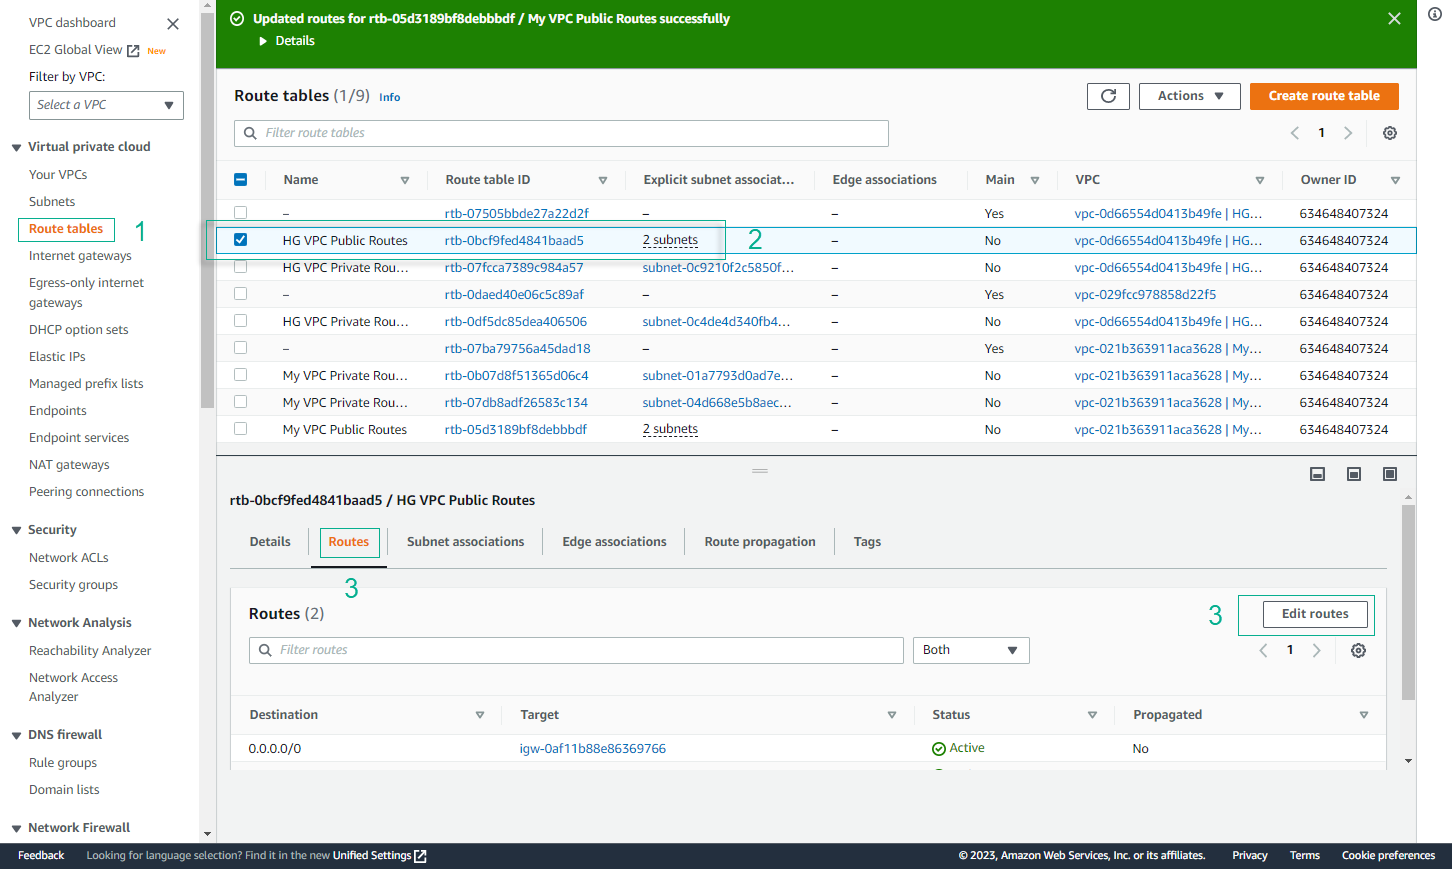
- Go to VPC Management Console, and select Route tables in the left sidebar.
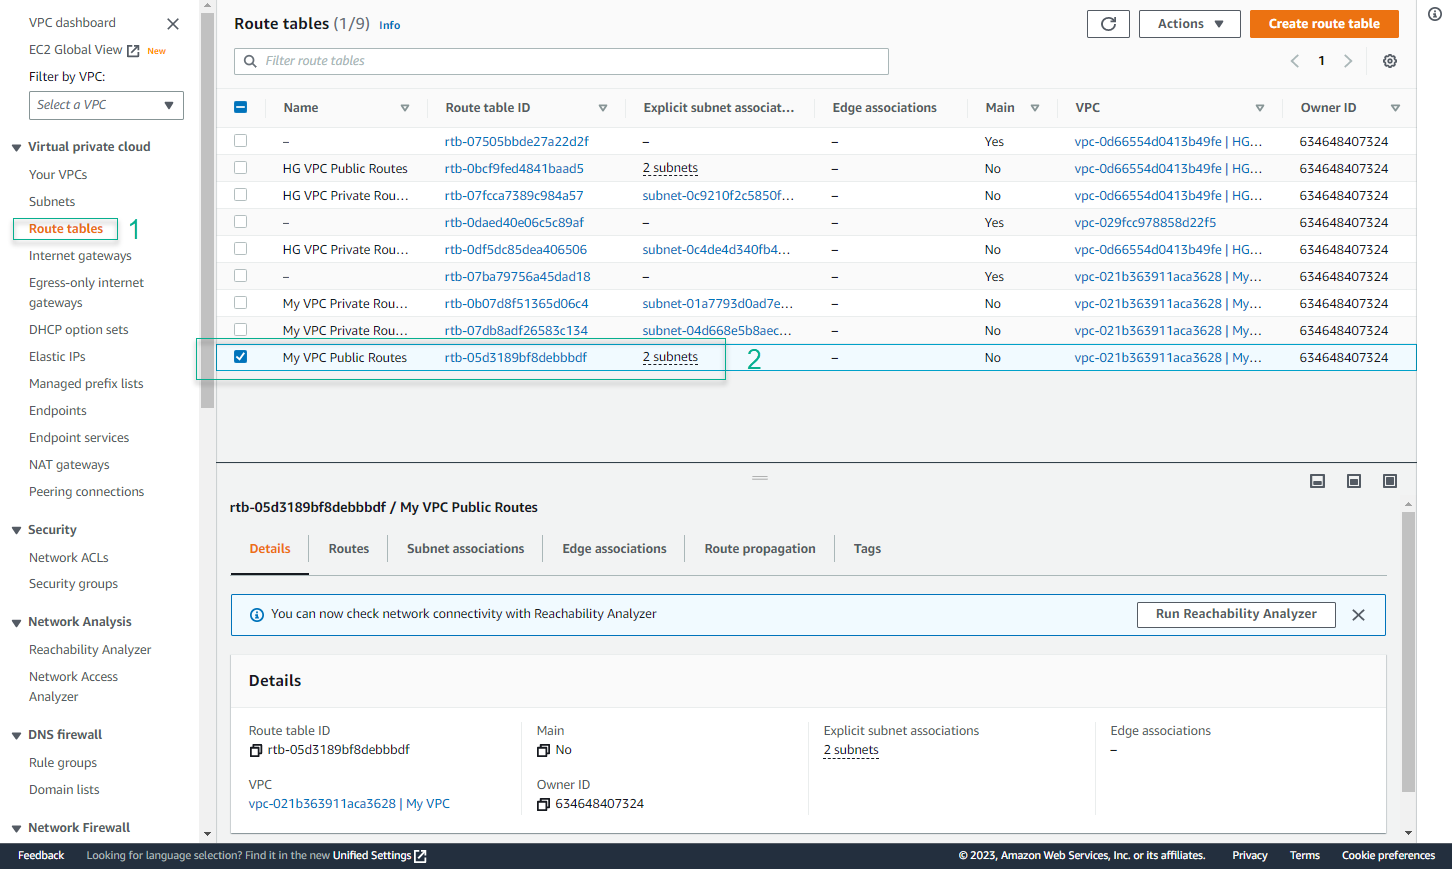
- Tick the routeing table My VPC Pubilc Routes, select the Routes tab on the screen below, and select Edit routes
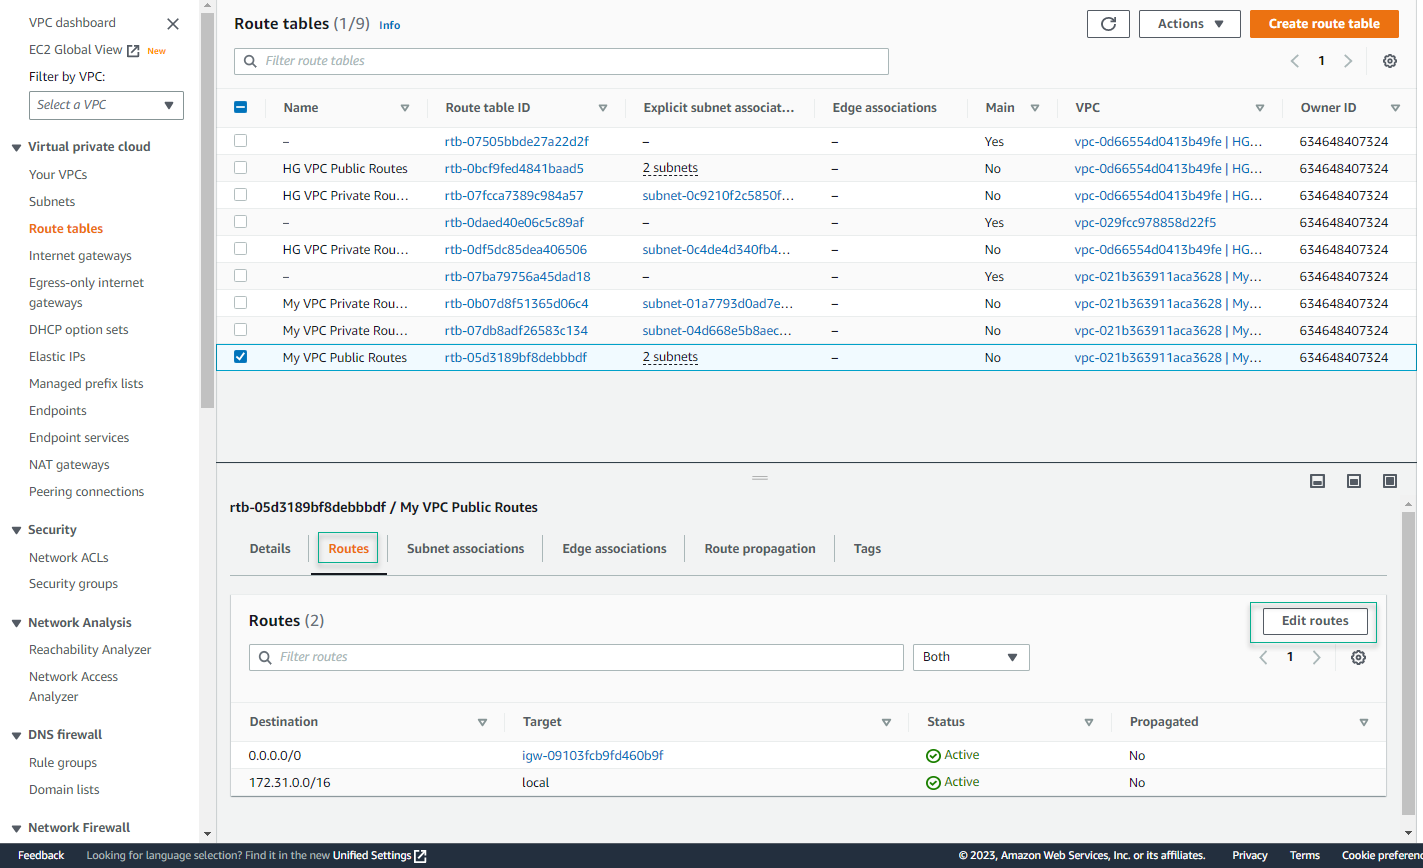
- Select Add route. Under the Destination column, enter 10.10.0.0/16. Under the Target column, select the Peering connection that we created.
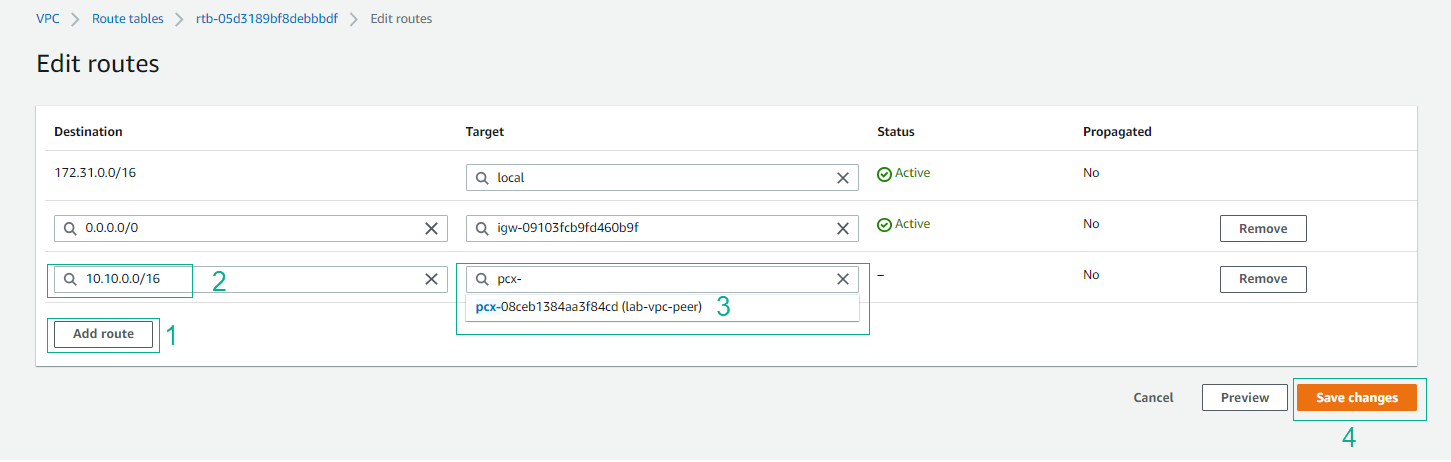
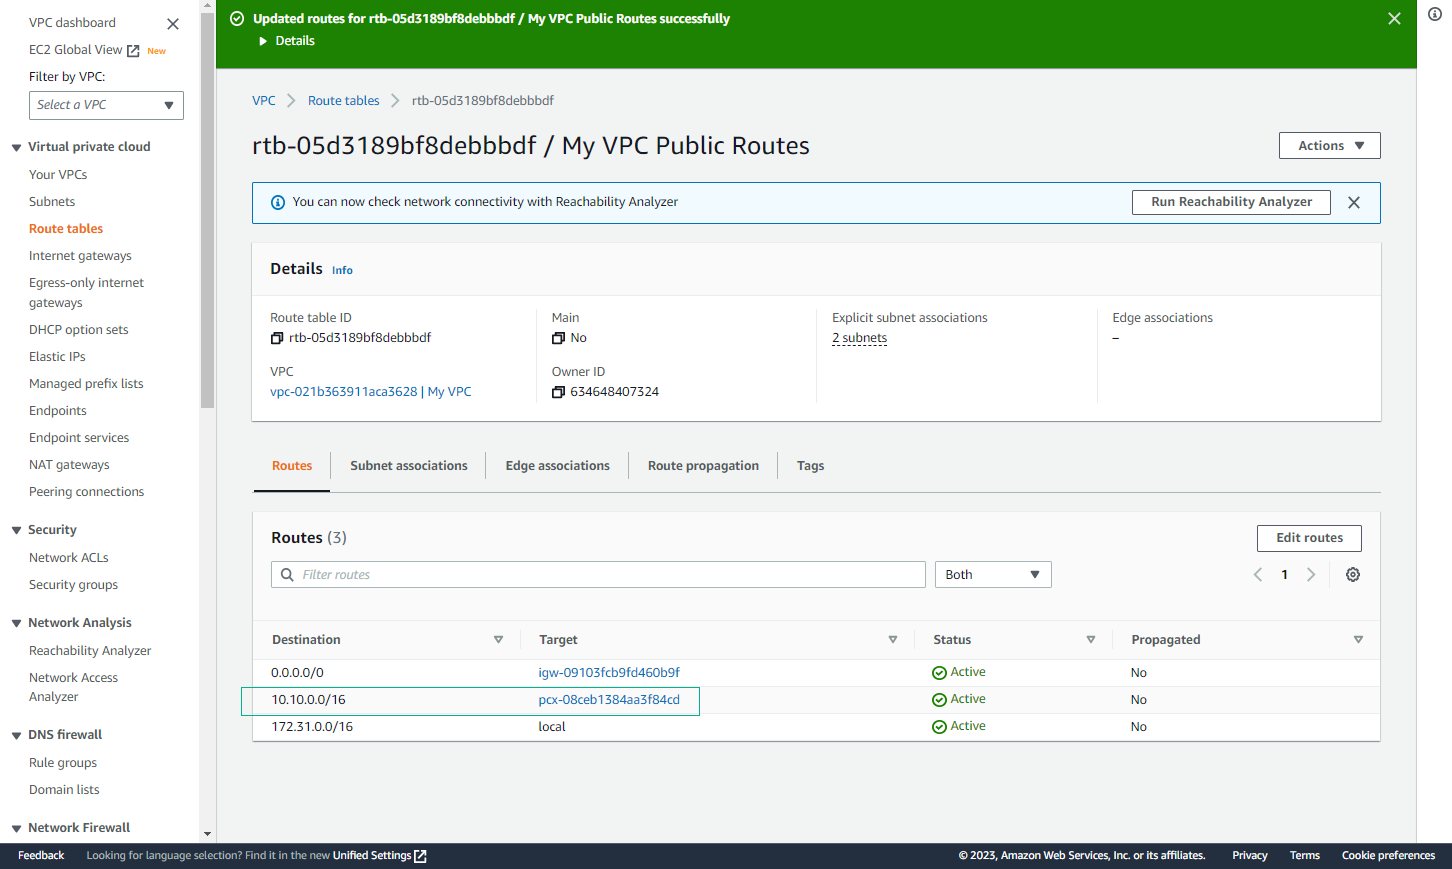
- Click Save changes. Thus, you have directed the queries for block 10.10.0.0/16 (HG VPC’s CIDR) to Peering connection that you created
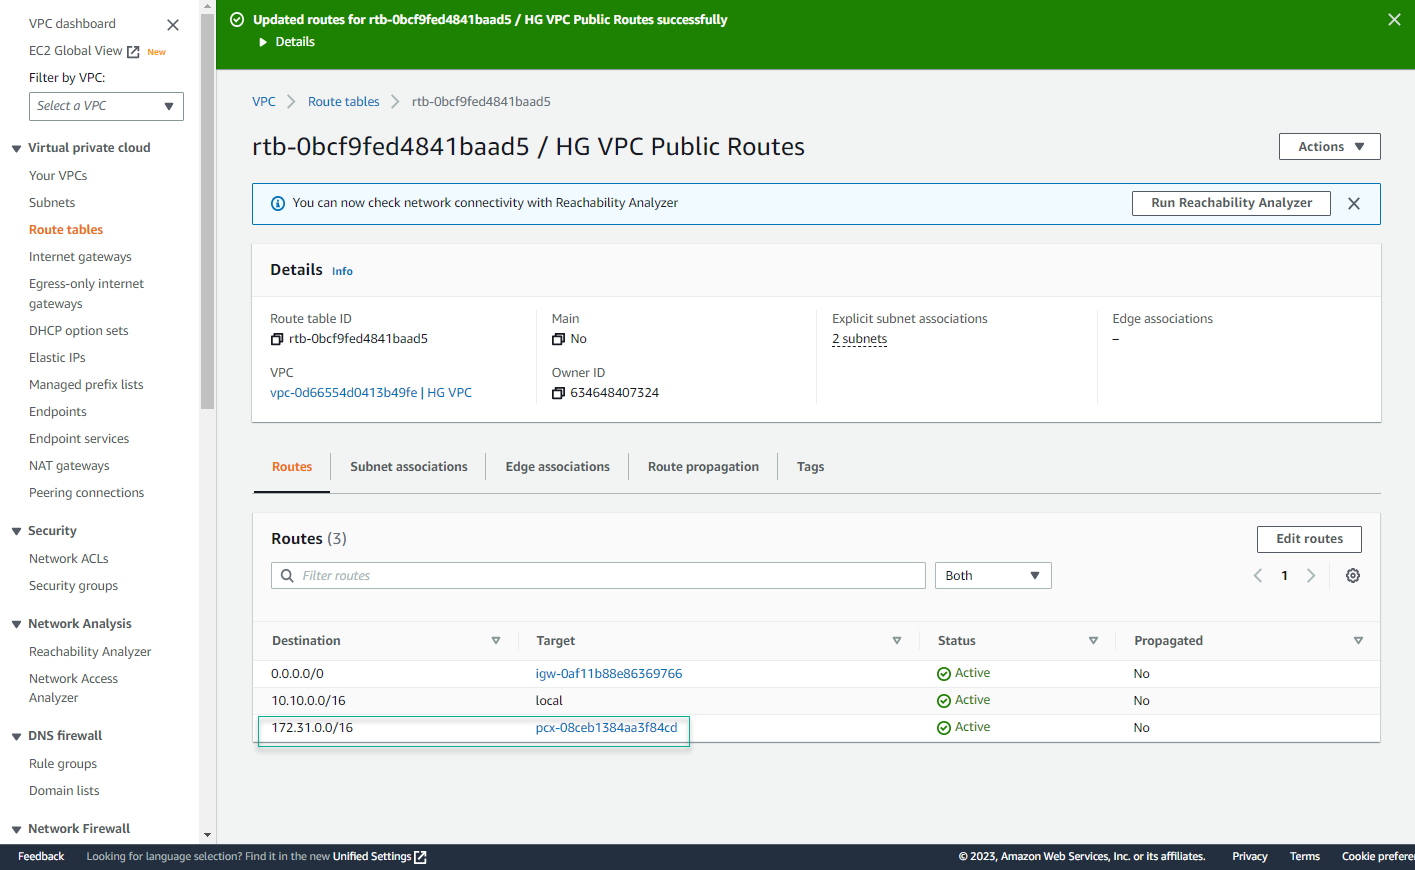
- Repeat adding a peering connection for route table HG VPC Public Routes.
- Under the Destination column, enter 172.31.0.0/16. Under the Target column, select the VPC Peering that we created.
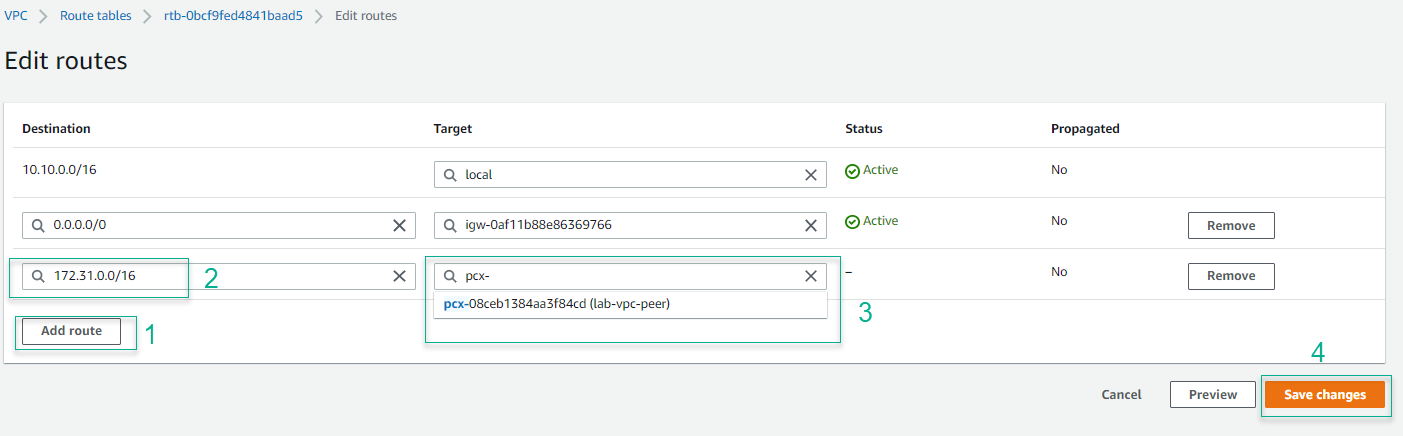
- Complete initialization.
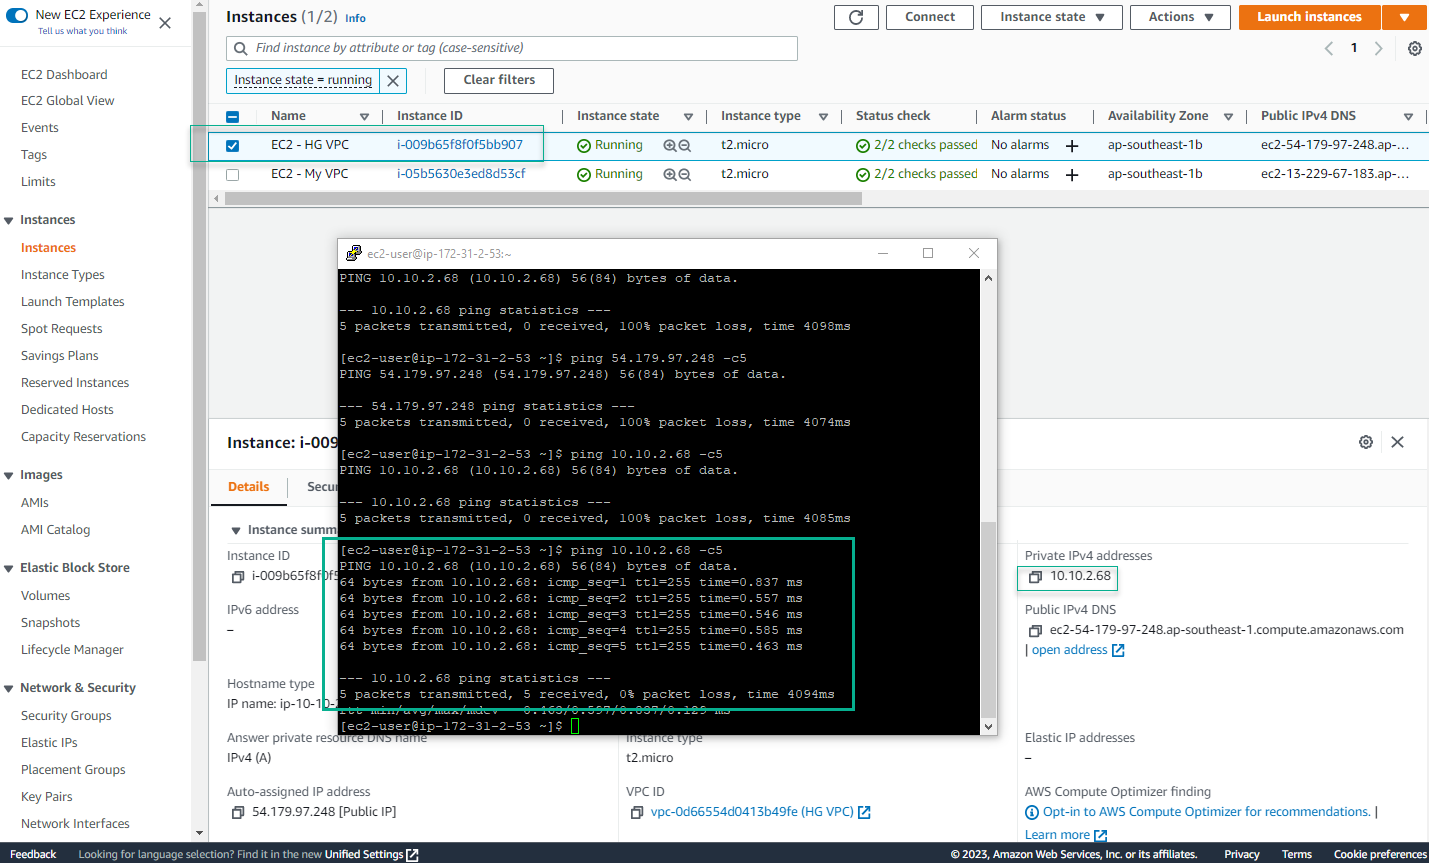
- From EC2 - My VPC, try pinging private IP of EC2 - HG VPC. Now we have succeeded.
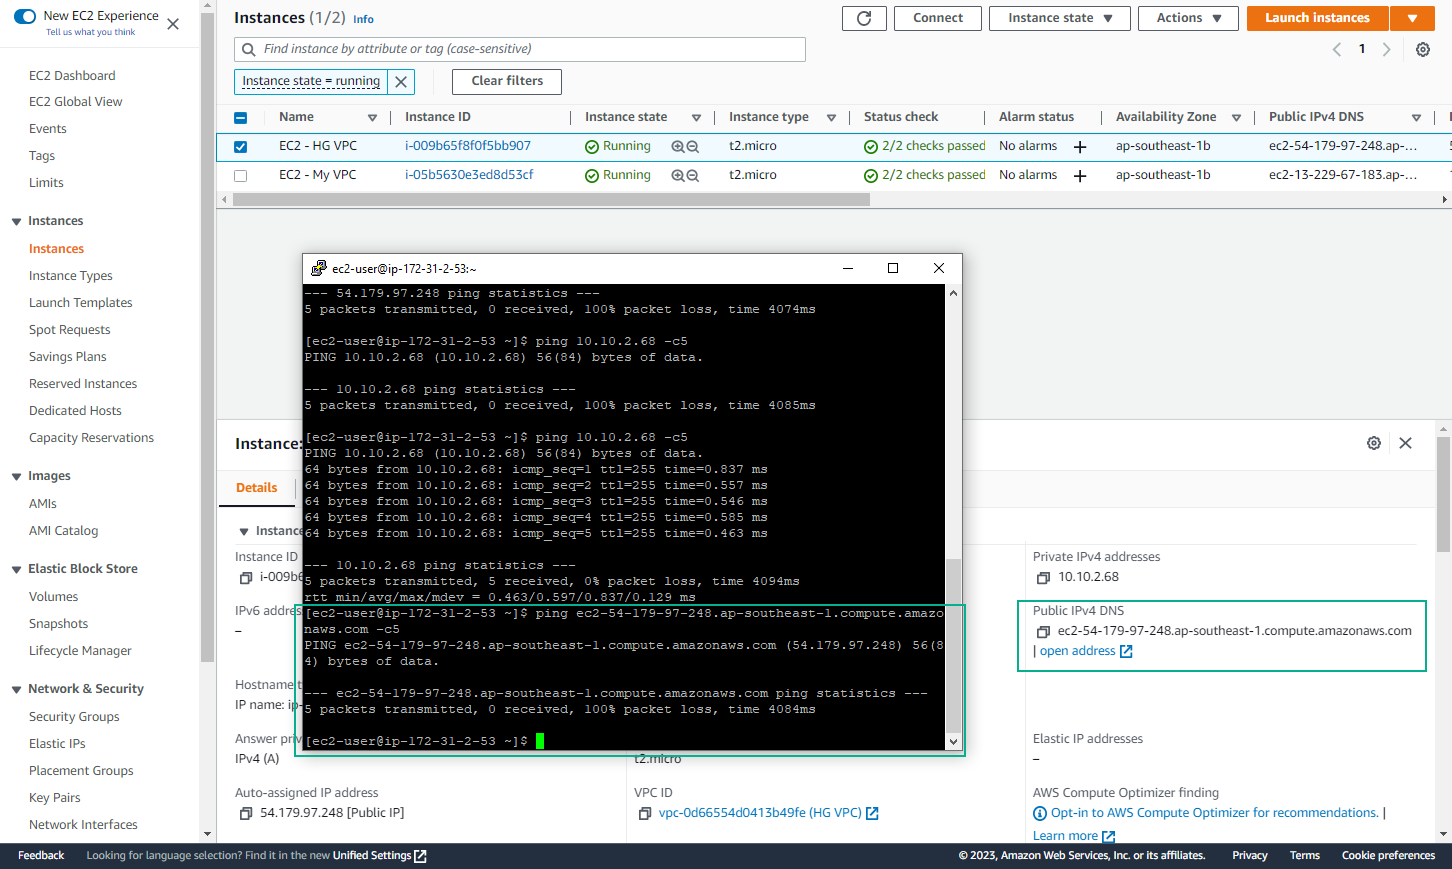
- However, when you try to ping public DNS of EC2 - HG VPC, you will fail because we have updated the Network ACL for the HG VPC subnets to prevent pings from the Internet. In the next section, you will click Cross-Peer DNS to fix this problem.
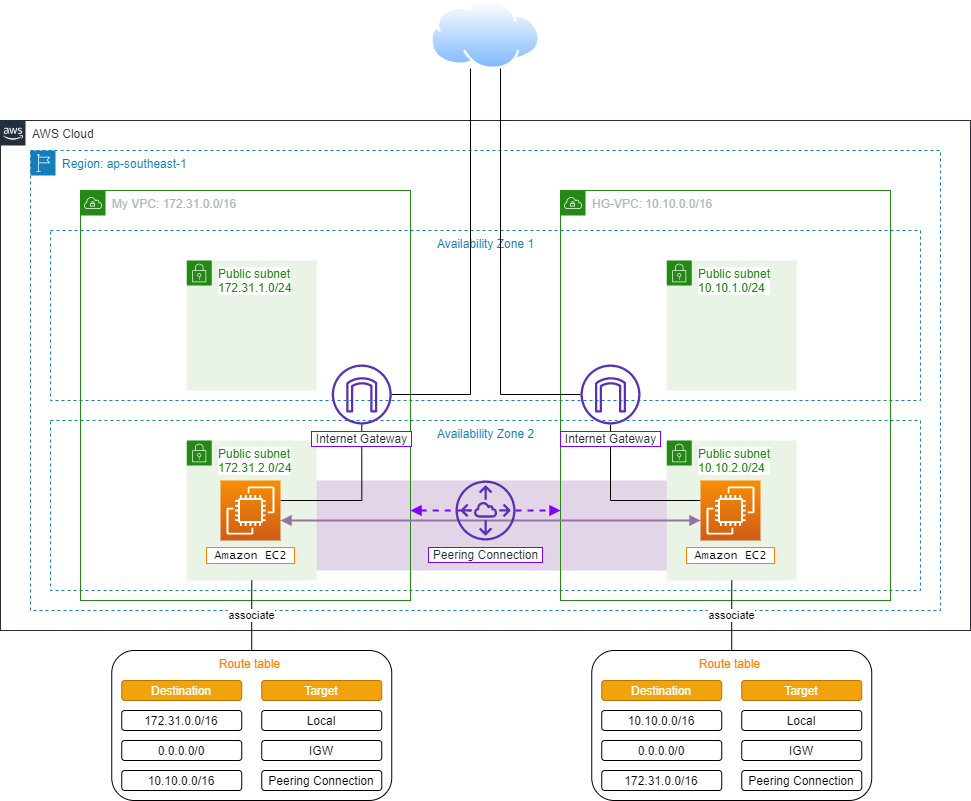
- At this point, we have completed the proposed lab architecture: